
‘Spring’ into action with these DIY projects!
Outdoor daybed
For a DIY challenge, give this outdoor day bed from Bunnings a go! Step-by-step instructions can also be found at bunnings.com.au/diy-advice/outdoor
You will need
- Batten screw bit
- Counter sinker
- Drill
- Drill bits
- Earmuffs
- Ear plugs
- Leather work gloves
- Safety glasses with shields
- Roofing square
- 10 x (125mm x 75mm x 625mm) cypress posts
- 6 x (125mm x 75mm x 750mm) cypress posts
- 4 x (90mm x 90mm x 2.4m) Merbau posts
- 4 x 90mm spacer off cuts
- 125mm timber batten screws
- Paint or stain
- Sandpaper
Instructions
1. Have your timber pre-cut: To make building your outdoor daybed easier, work out the length and width you want it to be and have the timber pre-cut at your local Bunnings. In this instance, we’ve used:
- 10 x 125mm x 75mm x 625mm cypress post for the vertical timber,
- 6 x 125mm x 75mm x 750mm cypress posts for the horizontal timber, and
- 4 x 90mm x 90mm x 2.4m Merbau posts.
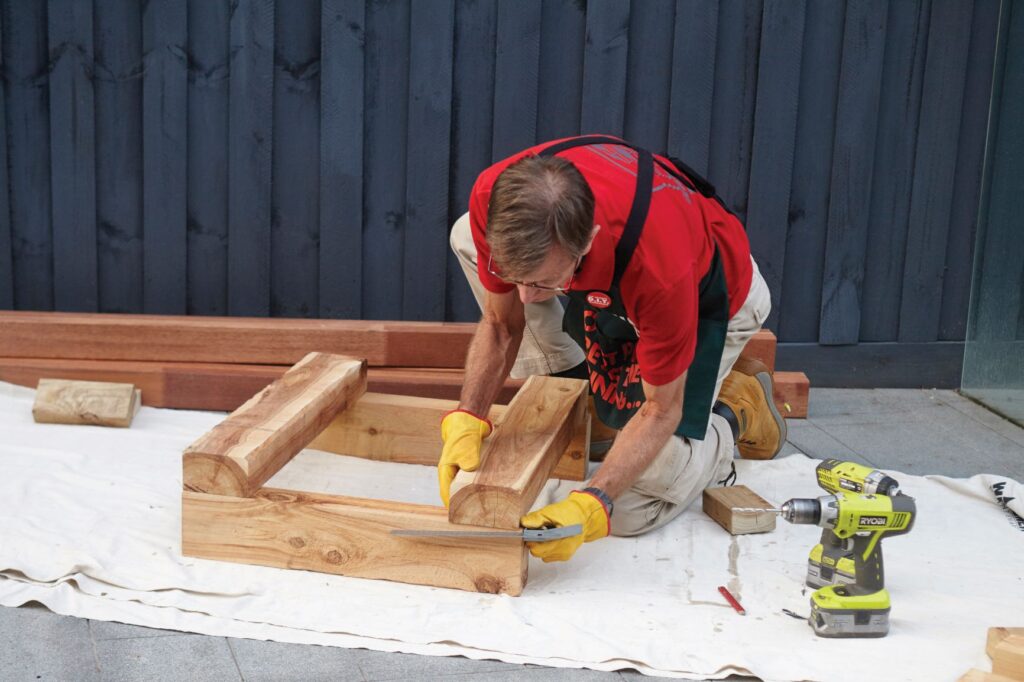
2. Build one end of your daybed: Lay out the timber first to make it easier to understand how the end of your daybed will fit together. Work on the ground to make the assembly process easier. Start with two vertical cypress posts (125mm x 75mm x 625mm) and lay two horizontal cypress posts (125mm x 75mm x 750mm) onto them in a square shape, making sure they line up evenly.
3. Measure, mark and drill the first horizontal piece: Measure and mark the ends of the first piece of horizontal timber so that you can secure it to the vertical pieces. Use a cordless drill to make the holes and countersink these so that the screws are hidden.
4. Drill the first horizontal piece: Drill one end of the first horizontal piece into place over the two vertical pieces. Then repeat this process for the other end until it’s firmly in place.
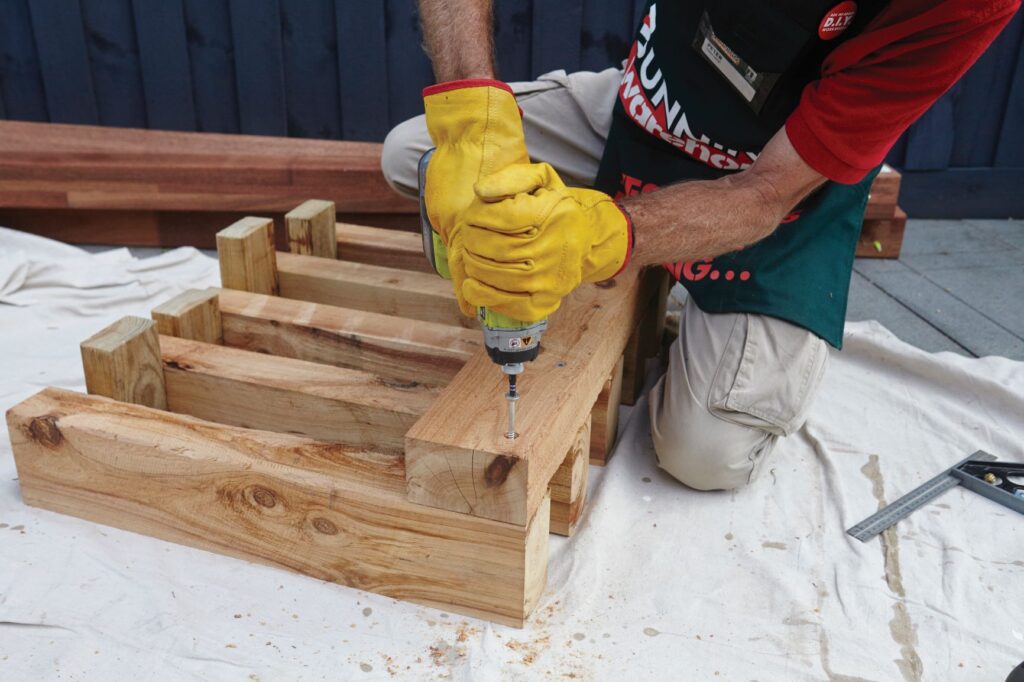
5. Insert the other vertical timber pieces: Lay the other three lengths of 625mm vertical timber beneath the fixed horizontal piece, between the other two. These will be the vertical posts at the end of your daybed. Use the 90mm spacers to ensure these verticals are evenly spaced apart.
6. Secure the horizontal timber: With the spacers in place, make sure the first piece of horizontal timber is flush with the end of the vertical timber. Pre-drill holes into the 750mm horizontal piece over the ends of the 625mm verticals and then screw together to secure.
7. Secure the second horizontal timber: Using the 90mm spacers, position the second 750mm horizontal at the other end of the verticals, making sure its flush with each end. Mark and drill pilot holes into the horizontal piece over each vertical and counter sink them. Use the drill to screw that horizontal securely in place.
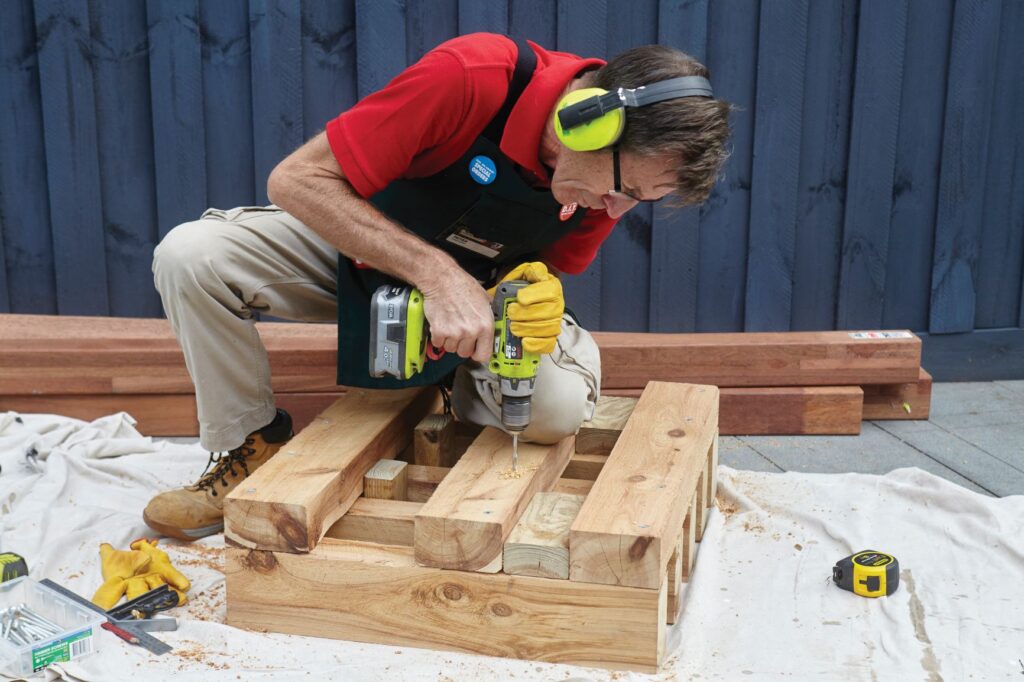
8. Secure the centre horizontal timber: The central horizontal timber is the load bearer for the daybed. Use the spacer to make sure it’s the same height (90mm) as the slats of wood you will use to sit on. Pre-drill the holes and countersink them. Then use the drill and screws to attach your timber securely to each piece of vertical timber.
9. Make the end square: Use a square to make sure that the end is square. If it’s not, use a hammer to tap it into place. Pre-drill a hole. Countersink it and then use the drill to secure a second screw into each of the three pieces of horizontal timber.
10. Build the second end: To build the second end, follow steps 2–9. Make sure you use the spacers so that it’s identical to the first end. Use sandpaper to smooth both ends of the daybed.
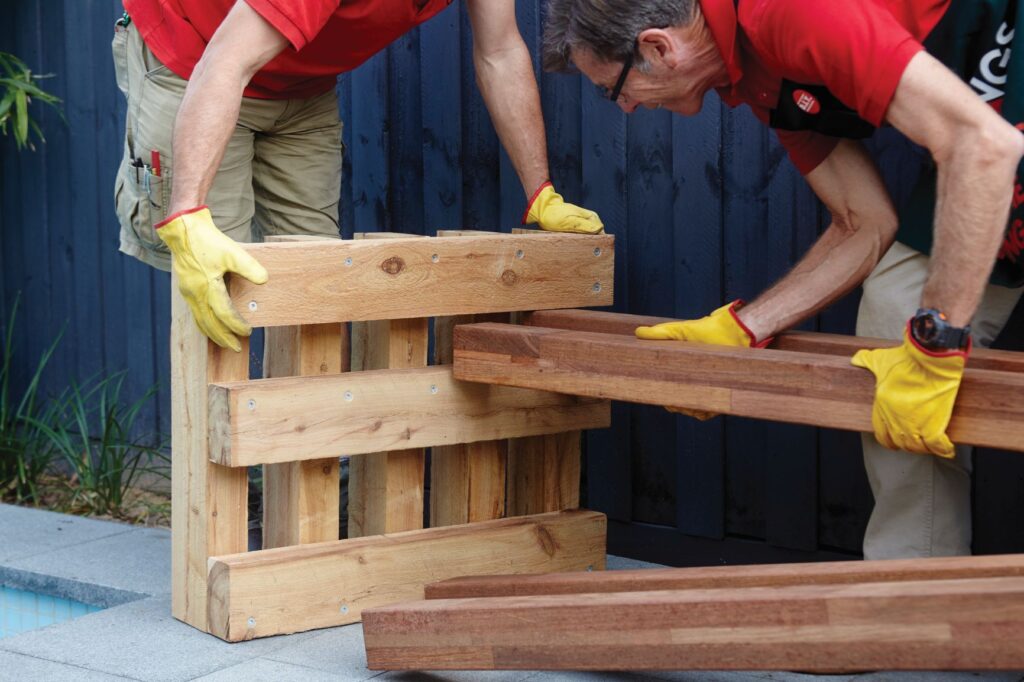
11. Put the daybed together: You’ll need someone to help you with this. Stand one of the ends up and slide the Merbau posts into the 90mm gap (between the top and second horizontal). Have someone stand the other end up and insert the opposite ends of the posts into that as well, until the daybed is complete. Make sure all the Merbau ends are flush with the stand ends.
12. Finish the daybed: Paint or stain your daybed depending on the look you want. Add some cushions and your daybed is ready to go.
For more:

