
Want to get Mum a gift she will keep forever? Interior stylist and DIY queen, Hayley Little (@mumlittleloves), has the answer with her DIY step by step guide on how to create the perfect bunch of faux blooms and foliage using brown paper, ribbon, scissors, string or twine.
Using 25 stems of Snap dragon, Eucalyptus, Eucalyptus Fruit and more, as well as some personal touches from her son, Hayley has created a gift that all mums are sure to love!
What you need:
- Flowers
- Brown paper
- Ribbon
- Scissors
- String or Twine
Activity steps
1.If you can, go into Early Settler and roughly create your bouquet in store. If you can’t get in store, you can order online, choose a variety of sizes and textures, also include a few pieces of greenery. Start with a larger bloom and work your way around in a circle from the centre. Keep adding blooms until you are happy with the size of your bunch.
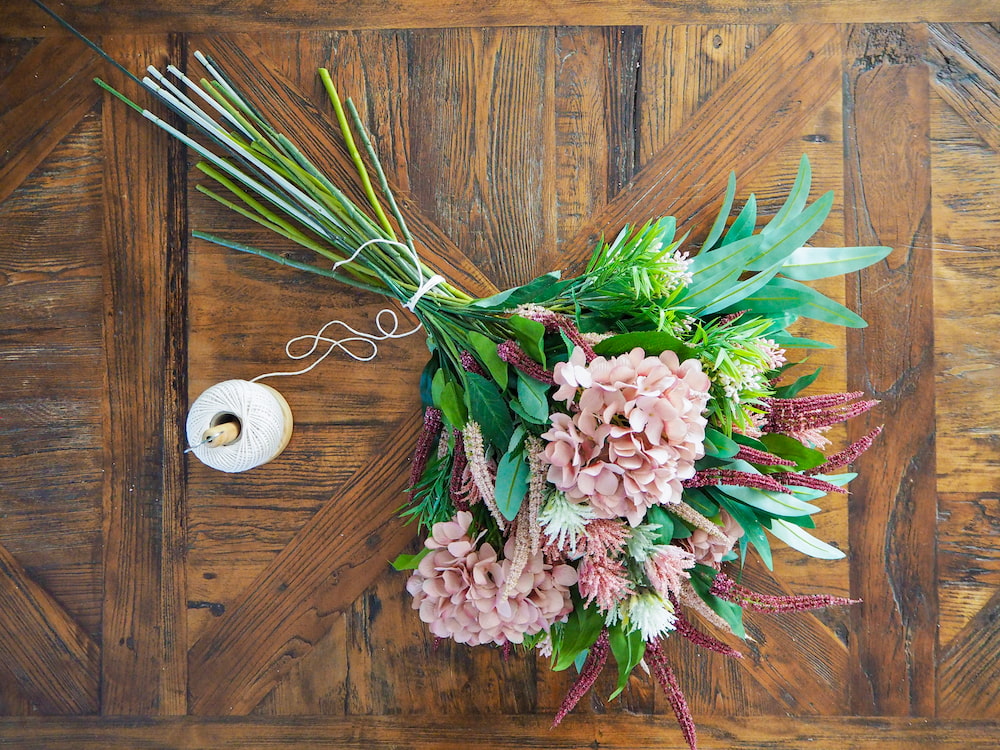
2. Remove excess leaves as you create your bouquet to allow the stems to nestle together without getting squashed.
3. Secure your bouquet with string, wrap it around a few times and use a simple double knot.
4. Trim the stems at the bottom so they all end at the same length. This looks cleaner and will sit evenly if you put your bouquet into a vase.
5. Now you are ready to wrap the bouquet just like a fresh bunch of flowers. Start with a rectangle of paper, the size will depend on how big the bouquet is. Hayley cut 1 metre from the roll which is 70cm wide
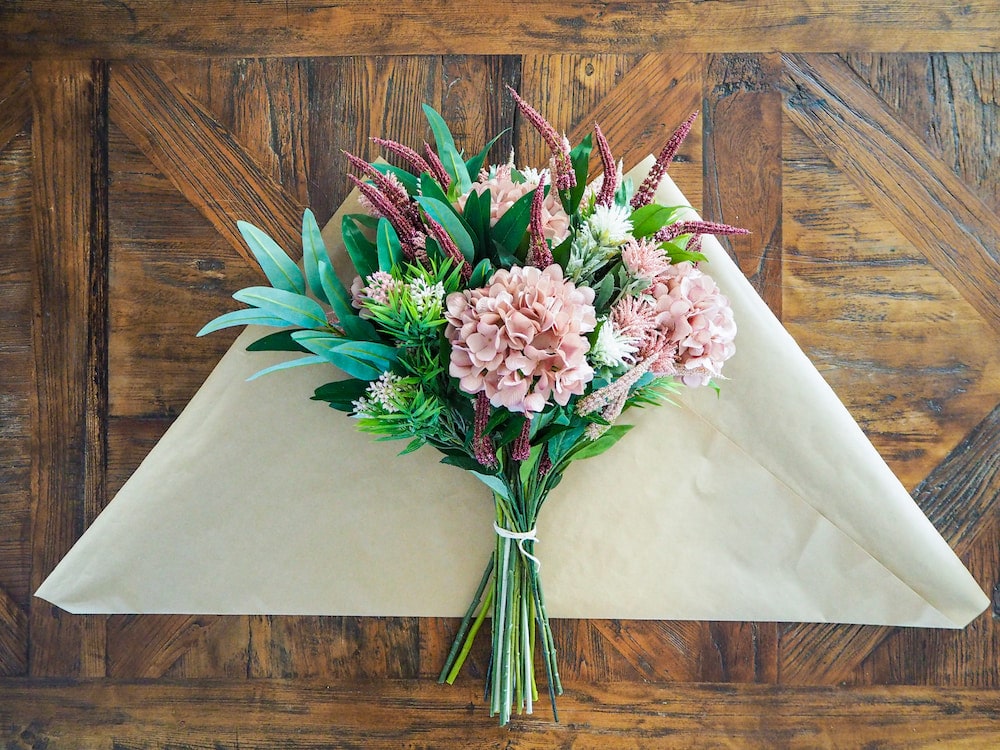
6. Turn the paper on an angle with one corner pointing up. Bring the opposite corner up to create two corners pointing up. Fold firmly.
7. Place your bouquet between the two points and wrap one side across your flowers.
8. Wrap the other side around and tie with string to secure the wrapping.
9. Now you’re ready for ribbon! Cut more than you think you will need; it will depend on the size of your bouquet. Hayley used approximately 2 metres.
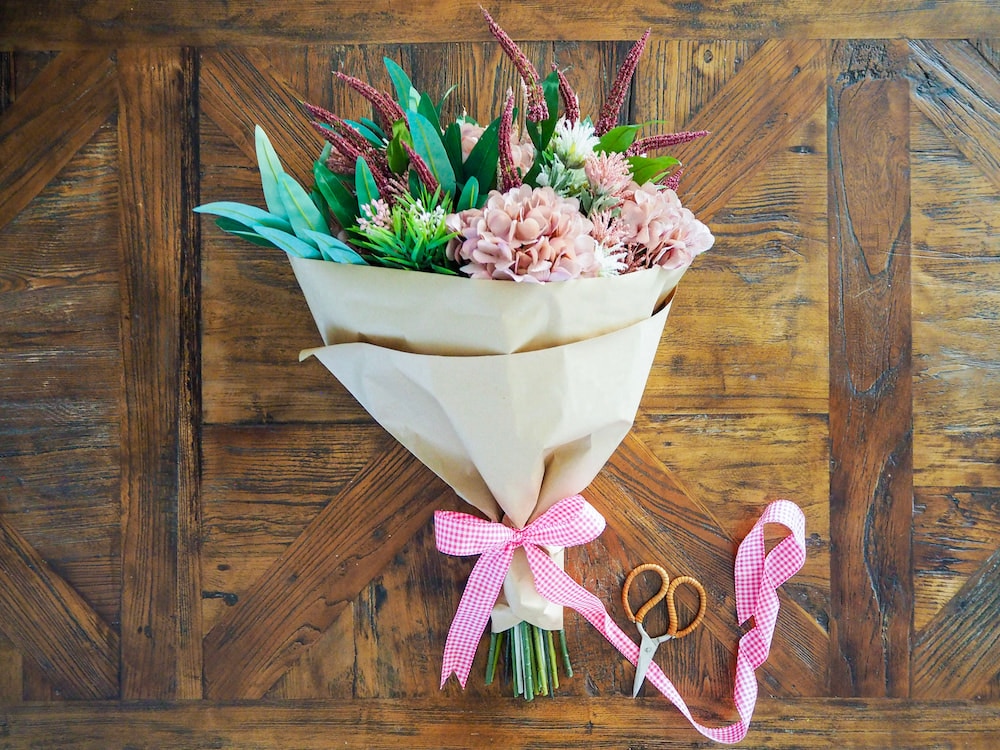
10. Wrap the ribbon around twice and tie with a simple knot. The secret to a good bow is making sure you start with the correct part of the ribbon. Make your first loop with the bottom piece of ribbon from your knot.
11. Create your second loop with the top piece of ribbon, it should go over the first loop, around the loop and pull through. Pull it tight and adjust the loops to your desired size.
12. Double point your ribbon on both ends, do this by folding the ribbon in half at the ends and cut at a 45 degree angle from the edge to the fold.
13. Give to Mum with love!

For More:


