
With Halloween growing in popularity, it puts more on parents’ to do lists – from costumes to decorations and cleaning up the associated mess.
Crafting expert Shannon Wong shares her tips for taking the horror out of Halloween so the whole family can have fun.
1. Comfort zone: My number one tip for parents who don’t feel so confident about getting crafty with their children is to always work within your comfort zone. Keep it simple to avoid stress and minimise mess.
2. Tool kit: You don’t need hundreds of felt tips and heaps of glue, glitter and paper – choose a few key materials that are easy to use and low on mess. The basics would be: coloured card, coloured pens or paint markers, string and a stapler. Place them in a container or tray to stop them rolling off the table and for easy grab-ability!
3. Don’t be scary: Halloween can be a tricky celebration as sometimes the imagery can be scary, especially for young children. Opt for bright colours and simple designs that spark kids’ imaginations without being frightening.
4. Get help: When you’re busy juggling work and family, the last thing you need is to conjure up craft projects, especially if it’s not your thing. There are plenty of resources out there – just hop online. I have developed two easy craft activities using Pintor Paint Markers. The Mix and Match Monster Mask contains different features that children can colour and glue onto their mask base to create their own design; and the Pintor Pumpkin Patch Mask comes in a variety of sizes. You can transform it into a colourful mask or cut out the smaller pieces to decorate trick or treat bags.
Halloween bat boxes
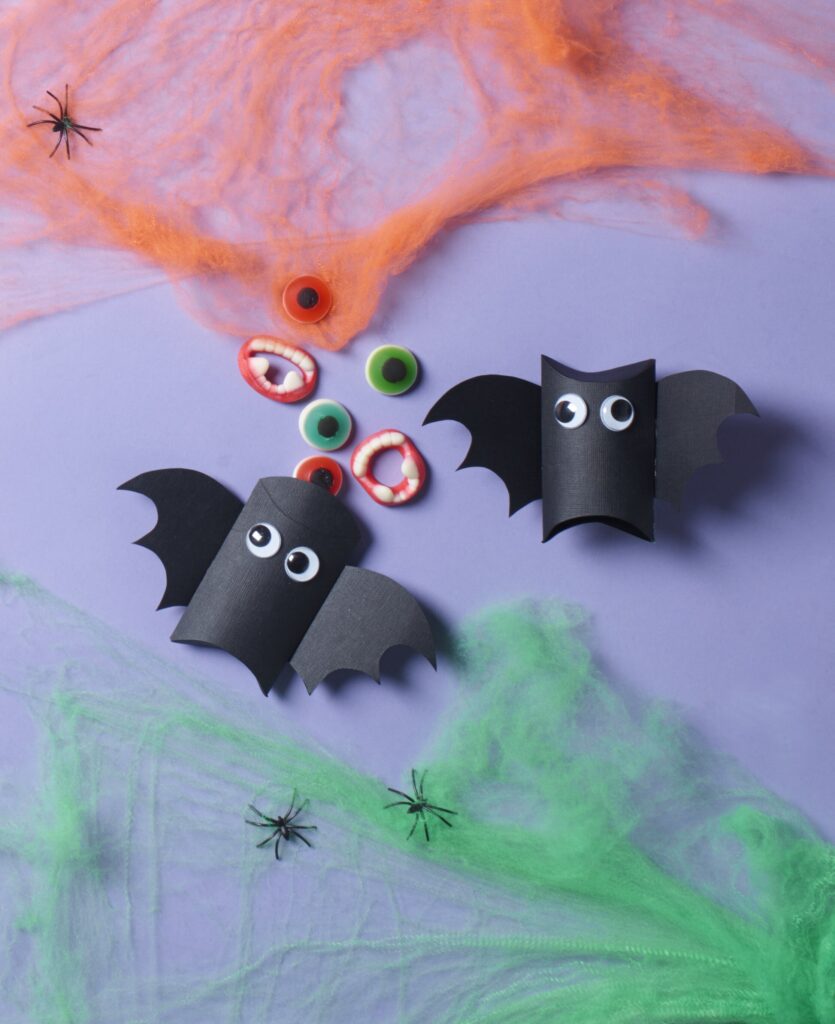
Project and image courtesy of Spotlight.
Level: Easy
What you’ll need
- Cardstock in black
- Scissors
- Pencil
- Hot glue gun and glue
- Glue dots
- Crochet hook
- Metal ruler
- Joggle eyes
Instructions
Step 1: Trace the template (available online at spotlightstores.com/projects/halloween-projects) for both box and wings onto black card. Cut out.
Step 2: Using a crochet hook, score the dotted lines on the box. Use a steel ruler to score the straight lines. Gently bend each fold to prepare for box construction.
Step 3: Apply glue to length of box on opposite side to flap. Fold box in half and fold flap to sit under glued edge and press together. Allow glue to dry.
Step 4: On box back, apply a short length of glue on either side of middle and an equal length in centre. Attach wings in this position.
Step 5: On front, stick joggle eyes in position. Firstly peel off paper backing then apply a glue dot to back of each eye. Typically the eyes would stick on fine on their own but as our box is flexible they need a little extra help this time.
Step 6: Once glue is dry, fold in bottom box flaps, one over the other. Fill your bat with treats. Fold in top flaps to close.
For more:

